
You can create devices in ThingsBoard:
- Manually using the dashboard
- In bulk using a csv file import
- Automatically by client request
In this tutorial we will look at auto provisioning. The process is
1 The client connects (MQTT, HTTP, COAP) to ThingsBoard and requests an Access token or other security key.
2. ThingsBoard responds with the token or a failure message.
In order to accomplish this a device profile is configured with auto provisioning enabled.
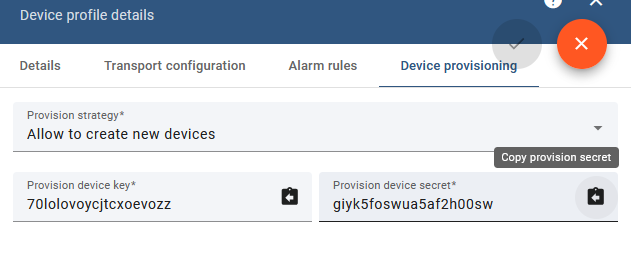
In my example I created a device profile called provisioning and enabled device provisioning using the Allow to create new devices option.
There are other options available, See docs, but this is the most common.
When you do this you are given a provisioning key and provisioning secret. This key and secret are used by all clients that require auto provisioning.
All you need to do is change the device name in each request.
The screen shot below shows the key and secret in the profile:
The client sends the following payload:
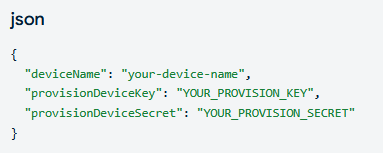
In my case the payload looks like this:
{

"deviceName": "dev1",

"provisionDeviceKey": "70lolovoycjtcxoevozz",

"provisionDeviceSecret": "giyk5foswua5af2h00sw"

}
You can use MQTT,HTTP or COAP for the transport protocol. I will illustrate with MQTT.
In this case we send a request on the topic /provision/request with a user name of provision.
We get a response which should contain the device Access token on the topic /provision/response.
Alternative Payload Format
If you prefer to generate your own access tokens as it makes life a little easier as you can have a system that makes knowing a device access token easier, then just send the token in the payload as shown below:
{

"deviceName": "dev3",

"provisionDeviceKey": "70lolovoycjtcxoevozz",

"provisionDeviceSecret": "giyk5foswua5af2h00sw",

"credentialsType": "ACCESS_TOKEN",

"token": "ACCESS_TOKEN-1"

}
Testing
You can test my using the mosquitto_pub and mosquitto_sub tools or any MQTT client tool. I use MQTT explorer in the video.
Request
mosquitto_pub -d -q 1 -h "$THINGSBOARD_HOST" -p 1883 -t "/provision/request" -u "provision" -m '{"deviceName": "DEVICE_NAME", "provisionDeviceKey": "KEY_HERE", "provisionDeviceSecret": "SECRET_HERE"}'
Response
mosquitto_sub -d -q 1 -h "$THINGSBOARD_HOST" -p 1883 -t "/provision/response" -u "provision"
Notice the client connects using a user name of provision.
Video
Related tutorials and Resources: