
If you are running MQTT on a closed network then creating and using your own certificates as explained in Creating and Using Client Certificates with MQTT and Mosquitto is perfectly fine.
However if you require public access to the broker over SSL and in particular over websockets and SSL then using a public certificate like let’s encrypt has advantages.
The main advantage of Public certificates have over self signed certificates is that they are natively supported by web browsers which is very important when using the JavaScript websockets client.
Let’s encrypt certificates are popular because they are free and trusted ( incorporated in popular browsers).
The main draw back of using them is that you need to go through the process of obtaining one which isn’t as straightforward as when you purchase one.
Using Certificates with Mosquitto
To use certificates on Mosquitto you will need to
- Obtain (create) the certificates
- Install the certificates on the broker
- Configure clients to use them.
Creating Let’s Encrypt Certificates
To get a certificate you need to have a valid Internet domain name and also:
- A web server running and access to the root folder of the web server
- Alternatively access to the DNS records of the domain name.
This is because as part of the verification process you need to add entries on the web server or alternatively add new DNS entries.
I will cover both methods in this tutorial but would point out that I didn’t get the web server method to work, and also this method cannot be used for wild card domain names.
Therefore my preferred method is DNS.
The certificate management is done using the certbot command line tool which you will need to install.
Certbot integrates with many web servers and can be used to automate certificate requests and renewals.
However as I am going to be using the certificate on mosquitto and so I will be covering the manual method only.
When using the manual method you will also need to manually renew the certificate.
Certificates are valid for 2 years
Installing Certbot
To install certbot on Ubuntu use:
sudo apt-get -y install certbot
There are more detailed install instructions here if needed
Certificate Types
With Let’s encrypt we can create a certificate for single host or for a wildcard domain a single host would look like this
mqtt.example.com
and a wildcard like this
*.example.com
The advantage of the wild card domain is that we could host a web server at:
www.example.com
and a mqtt broker at
mqtt.example.com
all using the same certificate.
However the web server and mqtt broker could share the same certificate without requiring a wild card domain as they use different ports and so are distinguishable from each other.
The only requirement is that you access them using this domain name.
General Process
- Run certbot with desired options.This can be done on any computer.
- Answer the prompts and stop when you get the instructions for making either the DNS changes or the web server changes.
- Go to your domain/web host and add files to the web server or text records to the DNS records.
- Complete process by pressing continue which should tell you that it worked or not.
Getting Certificates Examples
I will cover
- Getting a domain certificate using the web server method.
- Getting a wild card certificate using the web server method.
Getting a Domain certificate Web Server Method
In this method you request a certificate for a domain name and are then instructed to load file into a folder on the web server hosting that domain name.
Web servers can be accessed using the domain name or alternatively by convention using the domain name with a www prefix e.g
example.com or www.example.com
The command is
certbot certonly --manual --preferred-challenge http -d copeconsulting.co.uk
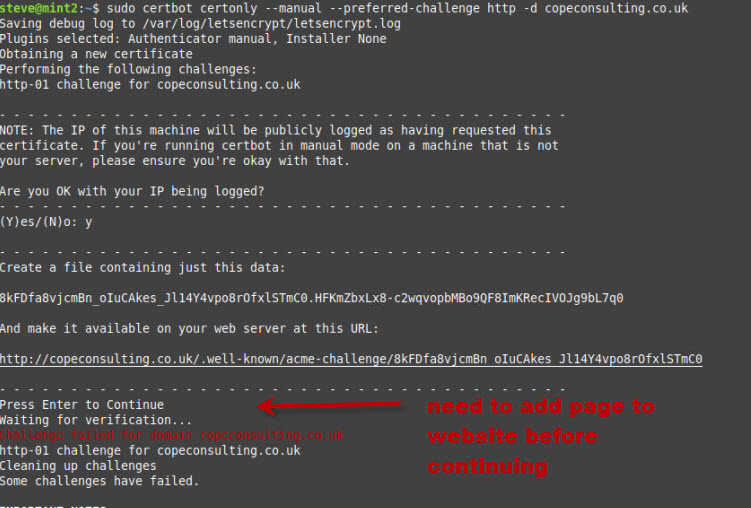
You can see that you are asked to create a file with a given name and place it in a folder on the website.
Once you have done this you click continue and the cerbot will go through the verification process and create the certificates if successful.
In my case it failed. It did give a reason but unfortunately I forgot to take a screen shot. I also tried several times with the same result.
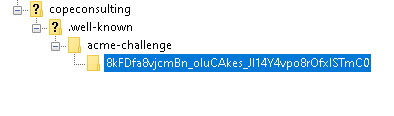
This is what my server folder looked like
Getting a Wild Card Certificate DNS Method
In this method you request a certificate for a wild card domain name and are then instructed to create a text record on your DNS server.
certbot certonly --manual --preferred-challenge dns -d *.copeconsulting.co.uk
Notice the challenge is DNS and the domain name using the wild card character *.
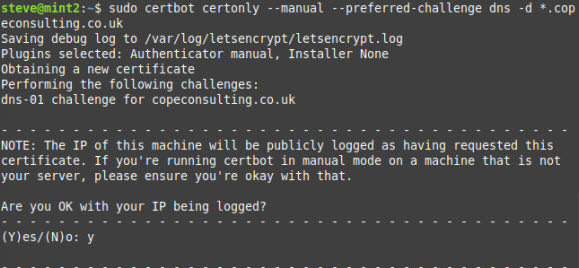
Note: You need to answer yes to IP being logged.
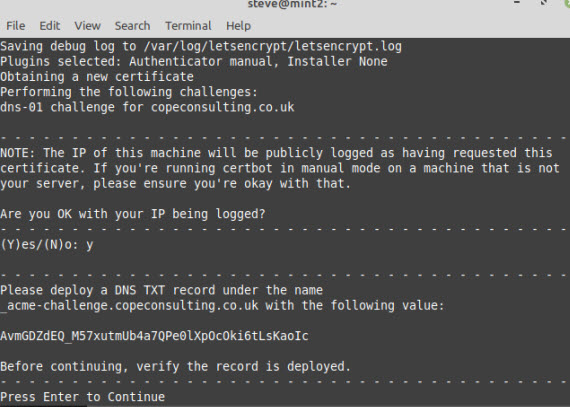
You now need to add text records to DNS on your Domain Name provider before continuing.
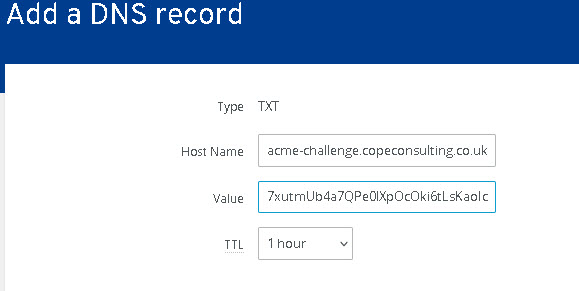
Now you click continue and you should get a verification successful message.
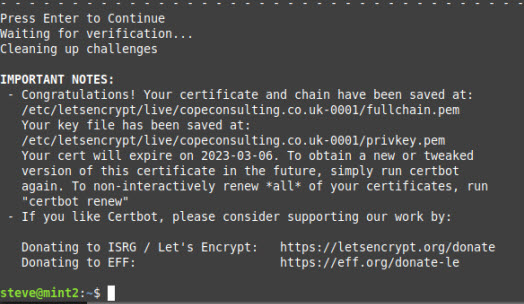
Let’encrypt store all files under the folder /etc/letsencrypt/live/domainname/ folder.
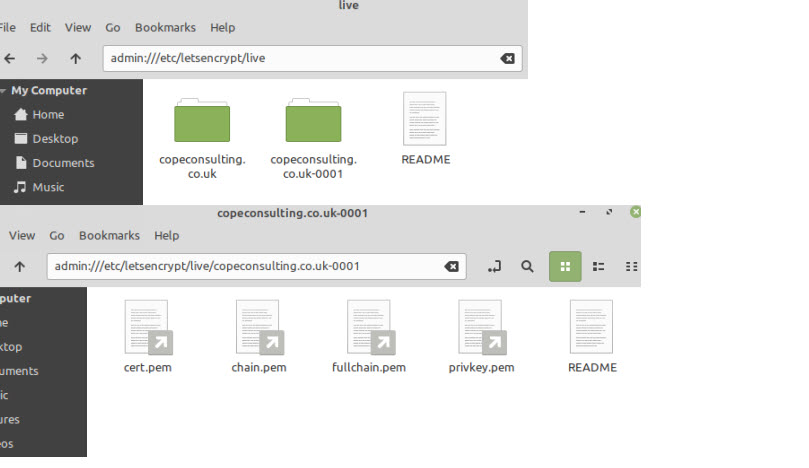
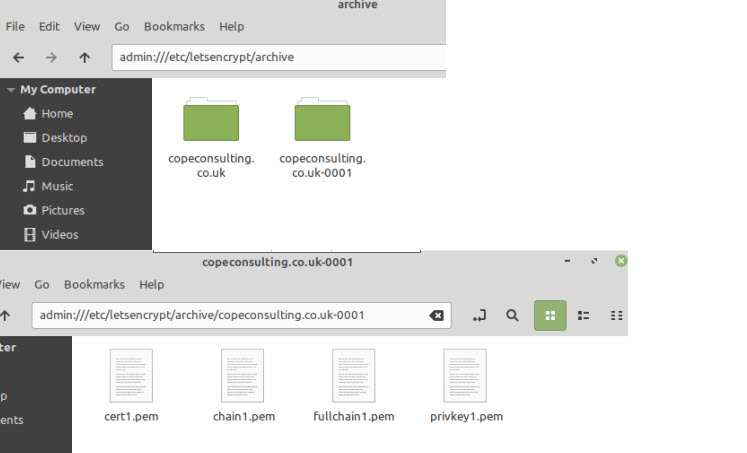
If you look in this folder you will see symbolic links to the files which are actually stored in the /etc/letsencrypt/archive folder.
Using The Certificate Files on Mosquitto
On a running serving mosquitto expects the certificate files and keys to be in the /etc/mosquitto/certs folder.
You can either copy these files there or create symbolic links to the files in the archive folder.
Let’s encrypt recommends the symbolic link method because the certificate renewal will work without the need for copying files.
However my attempt to do this failed and so I copied over the physical files from the archive folder into the /etc/mosquitto/certs/domain_name_folder/.
I also had to change the permissions on the privkey.pem file so that anyone could read it using.
sudo chmod 755 privkey.pem
The entries in the conf file are show below:
listener 8883
cafile /etc/mosquitto/certs/copeconsulting.co.uk-0001/chain.pem
keyfile /etc/mosquitto/certs/copeconsulting.co.uk-0001/privkey.pem
certfile /etc/mosquitto/certs/copeconsulting.co.uk-0001/cert.pem
This is what my /etc/mosquitto folder looks like:

Configuring Clients on Windows and Linux
On Linux trusted certificate files are stored in the /etc/ssl/certs folder.
This folder contains individual certificate files and also a bundled certificate file called ca-certificates.crt.
It shouldn’t be necessary to add the ca to the trusted store as it is probably already there but the procedure is given below.
———————————————–
You can add new certificates (e.g new.crt) to this store using the following process on Ubuntu
- Copy ther CA to the /usr/local/share/ca-certificates/ folder using sudo cp new.crt /usr/local/share/ca-certificates/new.crt
- Update the CA store: sudo update-ca-certificates
If need be you can remove it by deleting the certificate file from the /usr/local/share/ca-certificates/ folder and the running sudo update-ca-certificates again.
Reference here
————————————–
Now you can either use the capath switch or cafile switch in mosquitto_sub/pub
–capath /etc/ssl/certs or use –-cafile /etc/ssl/certs/ca-certificates.crt
mosquitto_pub -h mqtt.copeconsulting.co.uk --cafile certs/ca-certificates.crt -t test -m xx123456 -p 8883
On windows certificates are stored in the registry so are only usable by windows programs.
For utilities like mosquitto_pub/sub ,python or node clients then you need to download a copy of the ca-certificates.crt file and place it in a suitable location.
Download here
on my system I called the file cacert.crt and here is the an example using it
mosquitto_pub -h mqtt.copeconsulting.co.uk --cafile certs/cacert.crt -t test -m xx123456 -p 8883
Here is another example using the Python client on windows.
client.tls_set('c:/python34/steve/mqtt-demos/certs/cacert.crt',tls_version=ssl.PROTOCOL_TLSv1_2)
Note: You need to use a version 3.6 or above
Testing Tips
I always test from my home folder and place the cert files and conf files in directories in my home folder which usually avoids any permission issues.
After testing I then move the files to the /etc/mosquitto folder and test from the command line using:
sudo -u mosquitto mosquitto -c /etc/mosquitto/mosquitto.conf
This runs mosquitto as the mosquitto user and you will see any problems on the console.
After that I simple start mosquitto as a service using
sudo service mosquitto start
Problems Encountered
As mentioned previously I didn’t get the web server certificate request validation to work and I still don’t know why.
With the actual files I encountered permission problems. From research on the Internet it seems setting the file permissions to 755 was the standard.
chmod -R 755 cert_folder
Testing Using a Public Broker
When configuring certificates it can sometimes be difficult to know if the cause of a failure is broker configuration or client configuration.
Fortunately there are public test brokers available configured with Let’s encrypt certificates at test.mosquitto.org which you can use.
8081 : MQTT over WebSockets, encrypted, unauthenticated- Let’s encrypt
8886 : MQTT, encrypted, unauthenticated-Let’s encrypt
Common Questions and Answers
Q- I’ve created a certificate for example.com can I use it for a web server as well as mosquitto
A- Yes, but both must be accesible using example.com. Trying www.example.com will not work.
Q- I want to run my webserver on www.example.com and my mqtt broker on mqtt.example.com what should I do?
A- Create a wildcard certificate
Q- I’m using MQTT on an Intranet and am using MQTT with SSL. I will not be using websockets. Can I create my own certificate or do I need a public certificate
A- You can create your own and it is the best option. Let’s encrypt requires a Internet accessible domain name. See Creating and Using Client Certificates with MQTT and Mosquitto
Related Tutorials and Resources
- SSL and SSL Certificates Explained For Beginners
- Mosquitto SSL Configuration -MQTT TLS Security
- Understanding and Using the Mosquitto Dynamic Security Plugin
- Creating and Using Client Certificates with MQTT and Mosquitto
- Configure a Mosquitto Bridge With SSL Encryption
- Quick Guide to The Mosquitto.conf File With Examples
- SSL or Payload Encryption Discussion Post
Hi Steve,
Could you please assist – after 2 days trying am still not able to connect using websockets via browser to Mosquitto.
I am able to connect via port 1883 using mosquitto_pub and mosquitto_sub.
I have used Win-Acme to generate a LetsEncrypt certificate and am able to use this certificate to connect to a website via a browser. So, I am trying to use the same url (certificate) to connect using the paho-mqtt javascript client using port 8081 – firewall has port 8081 open. I am running on Windows 10 \ 11. LetsEncrypt provided 4 files (..-chain.pm, ..-chain-only.pem, …-key.pem,…-crt.pem) and I have copied these files to a specific directory accessible via Mosquitto.
My mosquitto.conf file has the following settings:
allow_anonymous false
per_listener_settings false
password_file C:\Mosquitto\MyPasswordFile
listener 1883
protocol mqtt
listener 8081
protocol websockets
cafile c:\Mosquitto\certs\public\myurl.net.au-chain.pem
keyfile c:\Mosquitto\certs\public\myurl.net.au-key.pem
certfile c:\Mosquitto\certs\public\myurl.net.au-crt.pem
tls_version tlsv1.2
Mosquitto (version 2.0.22) is running in verbose mode and starts up with websockets and port 8081.
I am using your sample .html file (modified for user id and passwords etc) and get the following error:
Error: Core error code: InvalidTabOrUrl injected.js:5:20888
Firefox can’t establish a connection to the server at wss://myurl.net.au:8081/mqtt. mqttws31.js:979:18
GET wss://myurl.au:8081/mqtt NS_ERROR_CONNECTION_REFUSED
Firefox can’t establish a connection to the server at wss://myurl.net.au:8081/mqtt.
Any assistance would be greatly appreciated.
Hi
Sorry for late reply but I am having email problems on the site and wasn’t notified.
Has the issue been resolved in the meantime?if not
Have you tried without SSL. Have you tried the on line test mosquito brokers just to rule out problems with the mosquitto version you are using.
In addition use allow anonymous and no password file until you get it working
Rgds
Steve
I think it’s important to warn the readers, that this configuration with keys specified in the conf, should be used ONLY if mosquitto manage the handshaking directly, in case NGINX/Apache handles the websocket initial connection to proxy it to mosquitto NO KEYS should be used in the mosquitto.conf.
This took me two days to figure it out, hope it helps other
Hello Steve,
Is there a way to use an encrypted connection without providing the –capath, i.e., similar to HTTPS. I followed your tutorial and installed the certificates from LetsEncrypt but I want my clients to connect using a secure (encrypted) connection without the need to provide them with key files. I want my clients to be able, for example, to publish a value using the following command:
mosquitto_pub -h mqtt.example.com -p 8883 -u username -P password -t /test -m 12
or using Python to connect like the following commands:
client.username_pw_set(‘username’, ‘password’)
client.connect(‘mqtt.example.com’, 8883)
Thank you,
Mohammed
Https is done by the browser and the CAs are already stored in the browser so that the user doesn’t need to do anything.
With Python or the mosquitto_pub /sub clients you need to tell them where the ca is as there is no default location.
Rgds
Steve
With letsencypt you place 3 pem files in your mosquitto conf file, then you go on to mention crt and certs you use cafile certs/cacert.crt. Is that a publicly available cert ? and is that what clients would use to connect?
Yes the link to download it is in the tutorial.
https://raw.githubusercontent.com/bagder/ca-bundle/master/ca-bundle.crt
also take a look at this
http://www.steves-internet-guide.com/configure-mosquitto-to-use-a-commercial-certificate-for-ssl/
Rgds
Steve
The cause of the expired certificate error in MQTT Explorer is that the DST Root CA X3 cross-sign has expired. MQTT Explorer uses the electron library that has the expired cert in it. Until that is fixed, you need to import the ISRGROOTX1 LetsEncrypt root certificate in MQTT Explorer. Get that here:
https://letsencrypt.org/certs/isrgrootx1.pem.txt
Alternative is to force certbot to use the ISRG Root X1 CA, by adding
–preferred-chain “ISRG Root X1”
to the certbot command.
The instruction to type “certbot certonly –manual –preferrred-challenge http -d copeconsulting.co.uk” has an extra ‘r’ in the word ‘preferred’, causing it to fail.
Hi
Sorry about that and tks for letting me know I’ve corrected it.
Rgds
Steve